Taking Lens Cleanup
There were some fungus on the Carl Zeiss Tessar lens of this camera. Unfortunately it was the rear lens that got affected, so we will need to remove the front plate.
Lens Design
The Carl Zeiss Tessar has a 3-groups-4-elements design: four lenses in three parts. The Compur is located between the second and the third group.

(Source: Wikipedia - History of photographic lens design)
Tools and Materials
- Lens paper, diluted alcohol
- Flat-blade screwdriver
- Rubber mat
- Spanner wrench (or a metal ruler will do, but not recommended)
You don't need any tools here if you only need to remove the front lens.
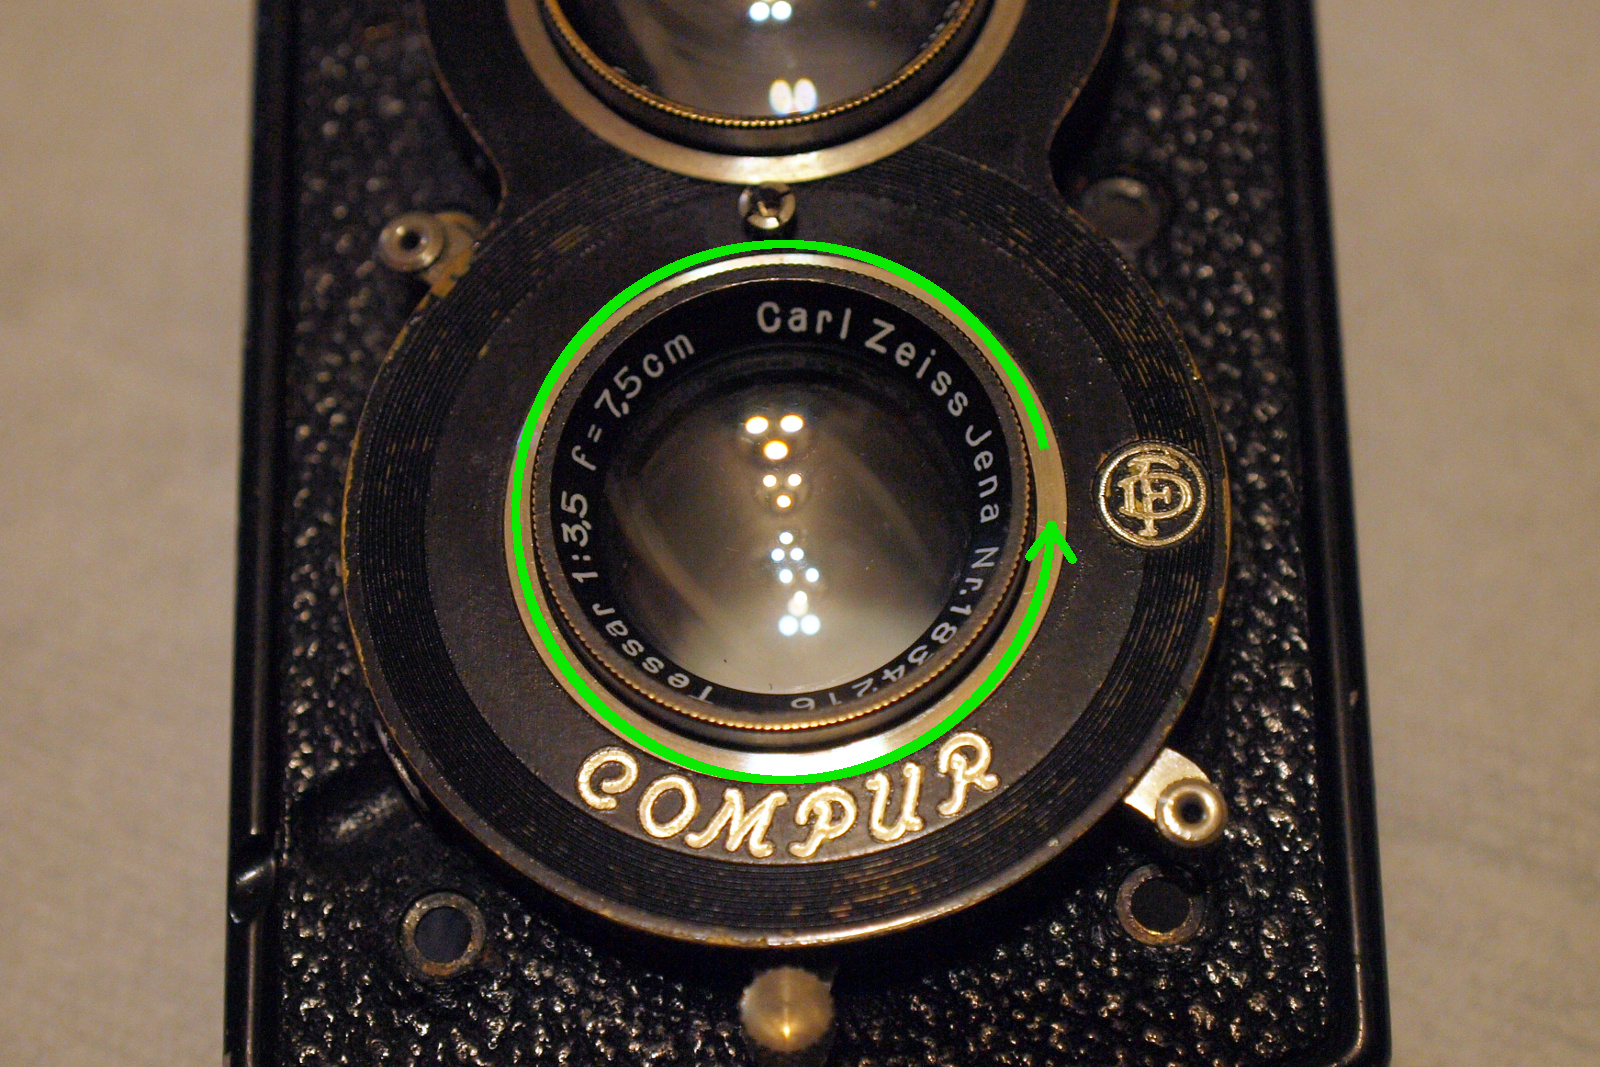
Front Lens Removal
This is the easiest part, just turn the lens with your hands in counter-clockwise direction to remove it. If it's too tight, try to use the rubber mat to increase the friction:
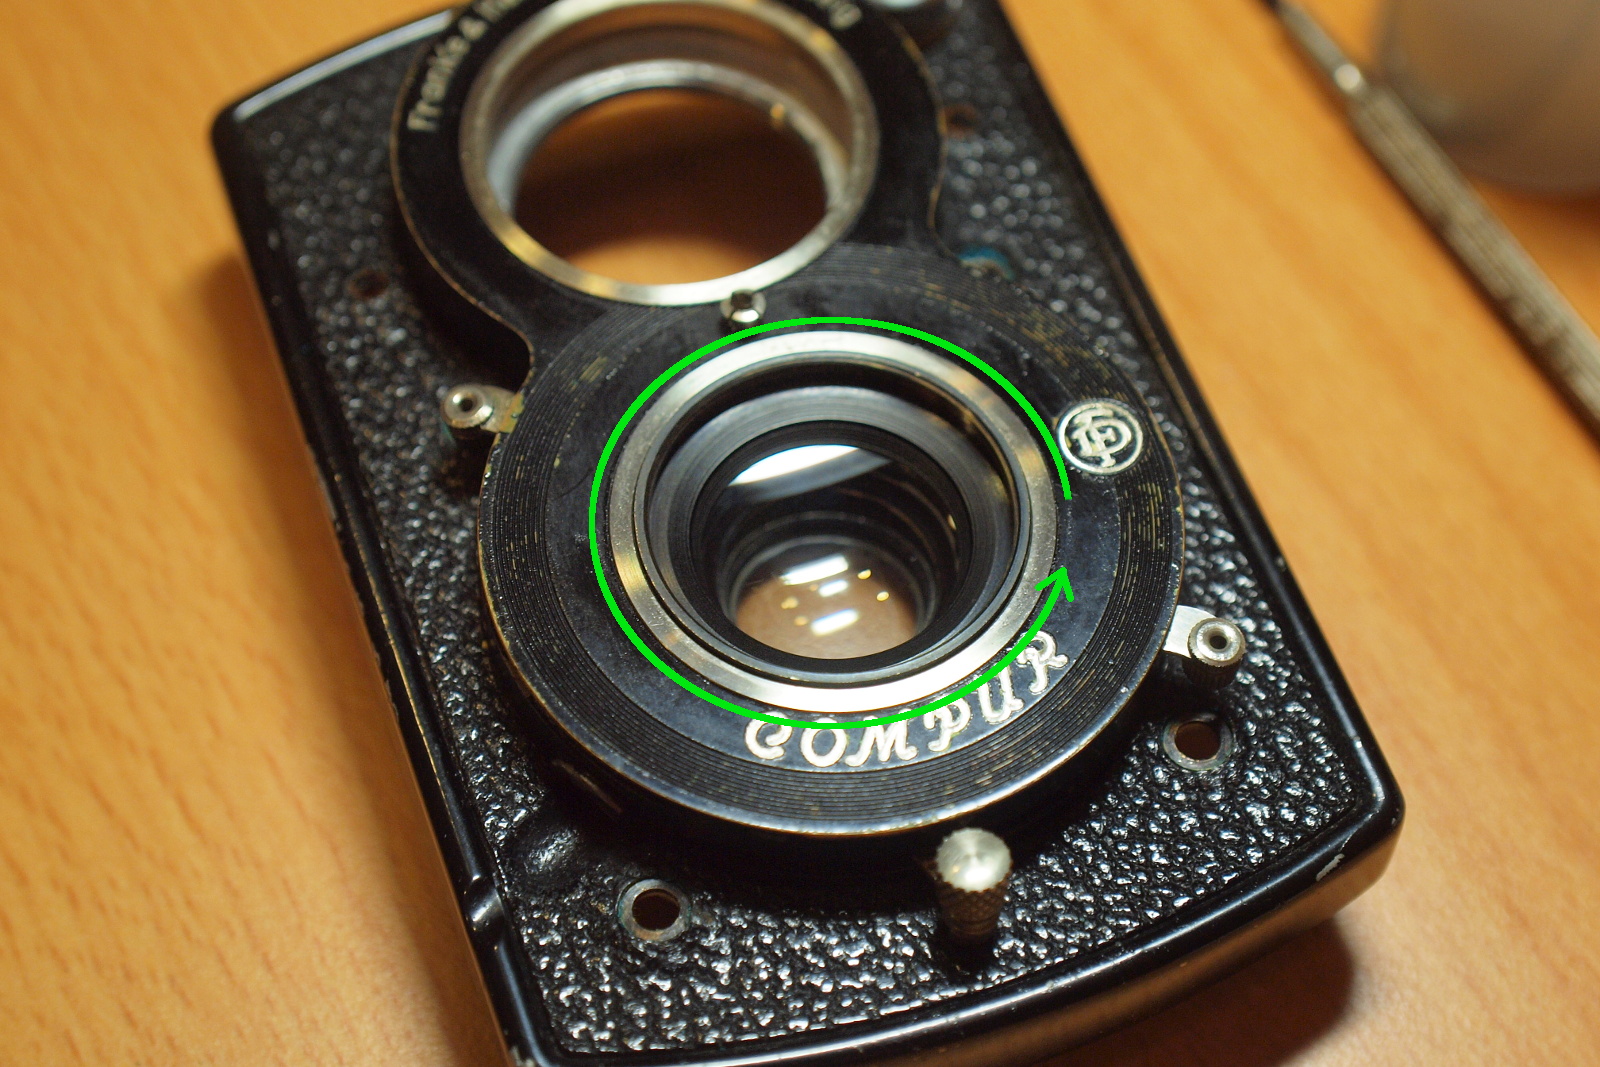
Rear Lens Removal
After the front plate was removed, the first thing in sight is the light shade on the rear lens, remove it by turning it in counter-clockwise direction (or use the spanner wrench):
 The rear lens can be removed now, turn it in counter-clockwise direction:
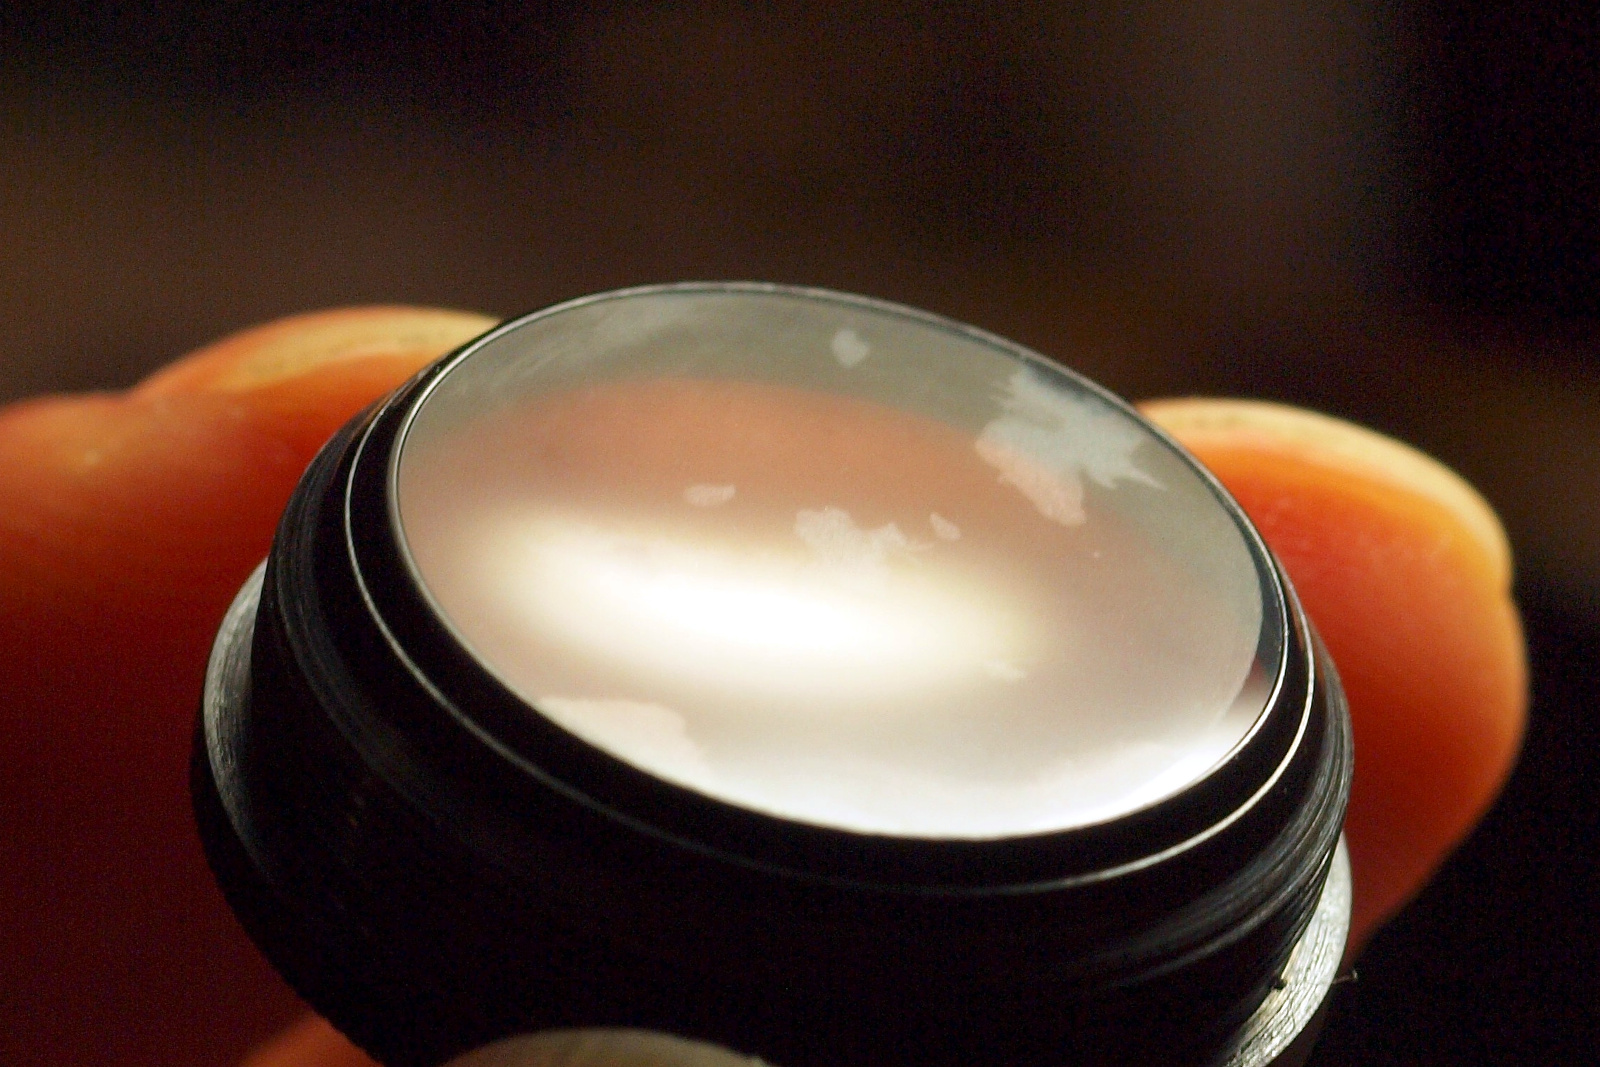
 Fungus on the read lens, you can see they grow on the edge:
 The fungus trace still can be seen if you breath on the glass:
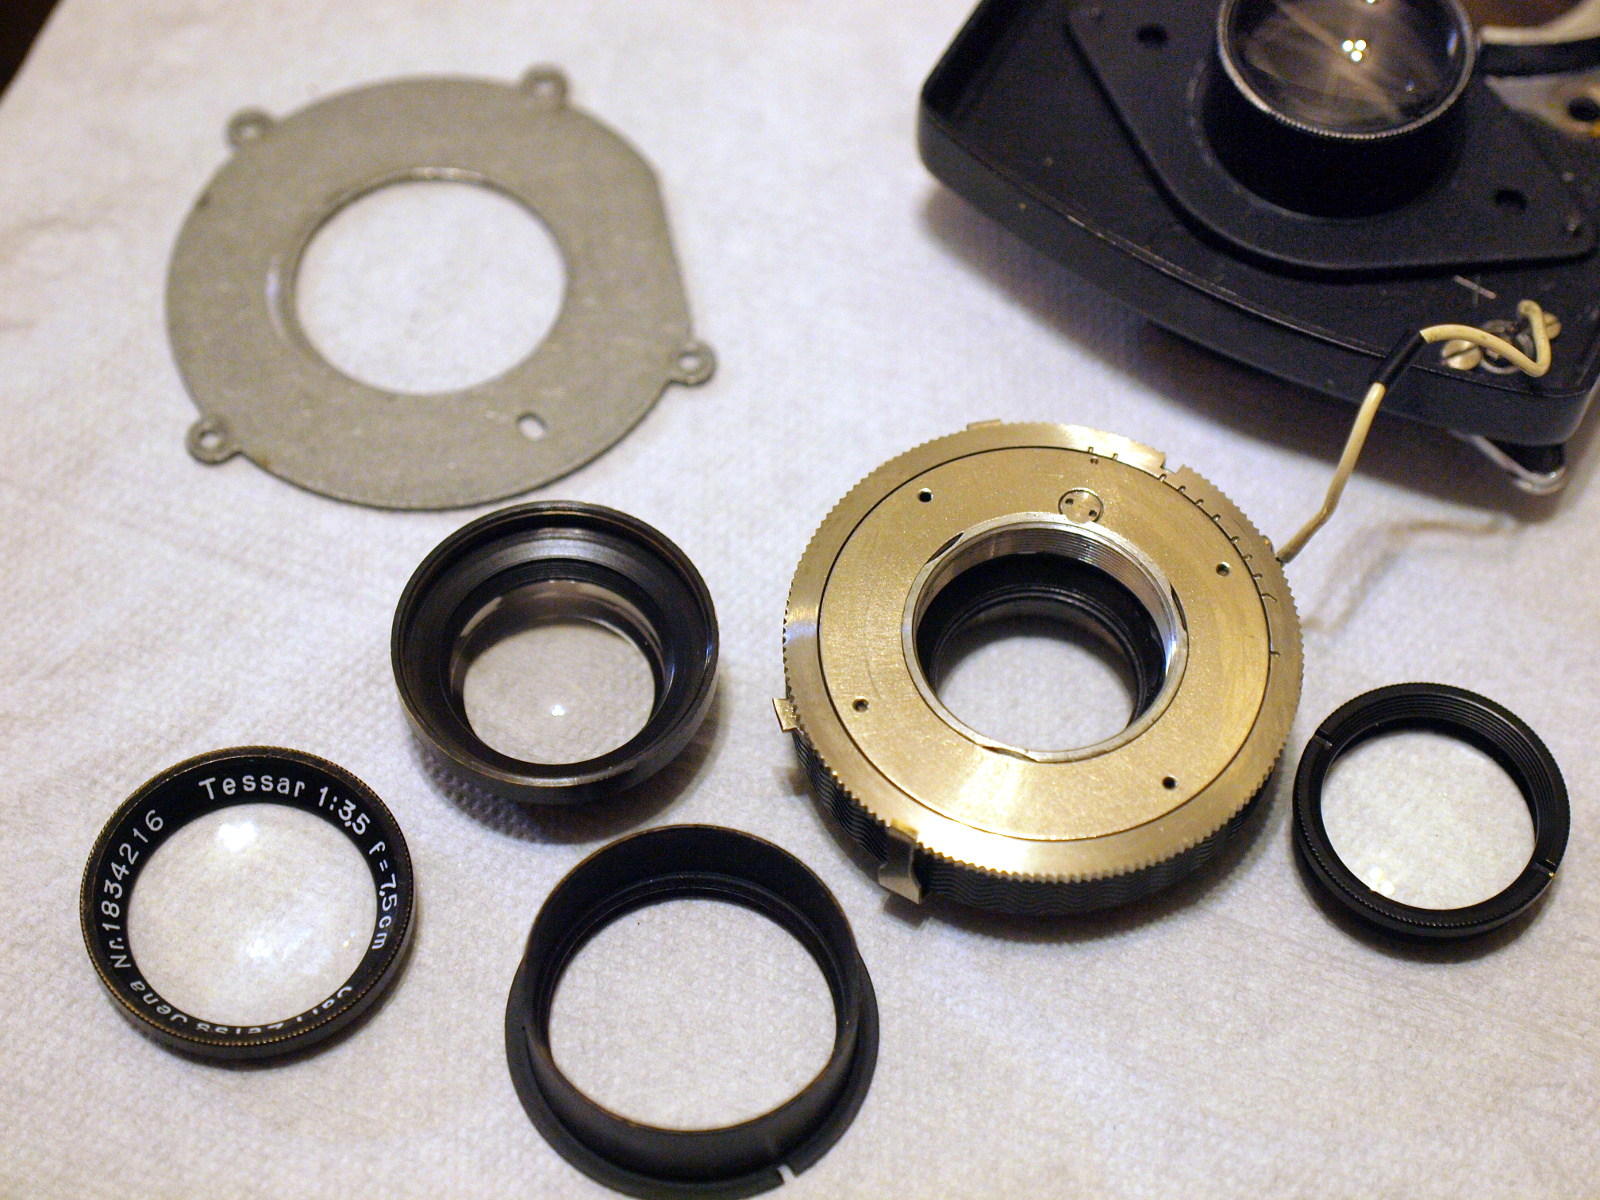
 Now all the lenses are available for cleaning. For the middle lens which is still attached to the front plate, use T shutter to open the blades and you will be able to clean both sides.
Middle Lens Removal
To remove the middle lens, unscrew it from the front plate in counter-clockwise direction. As shown in the picture below, this could be a difficult task as the lens is just slightly extended out from the front plate (rubber mat might be useful here). Another approach is to remove the Compur component, and unscrew the lens from it.
With Compur removed (note that the shutter coupler is not in this picture):
 Before and after comparison, there are still some dusts inside, but it's much better now:
