Front Plate Removal
This task is pretty easy. Just make sure not to touch the focus screw, or you will have extra calibration tasks to do.
Tools and Materials
- Flat-blade screwdriver
Steps
It's better to start with focus knob set to infinity. Remove four big screws on the front to remove the front plate. The screws in the yellow circles are for the taking lens:

The brass parts here are the focus screws, they can be seen with front plate removed. Lubricate them if the focus is sluggish. Please note that they can be turned easily, and if they're misaligned too much, you might need to do the focus calibration:

Note for Assembly
There are small dots located on the screw hole of the front plate, this should fit together with the notch on the focus screw:
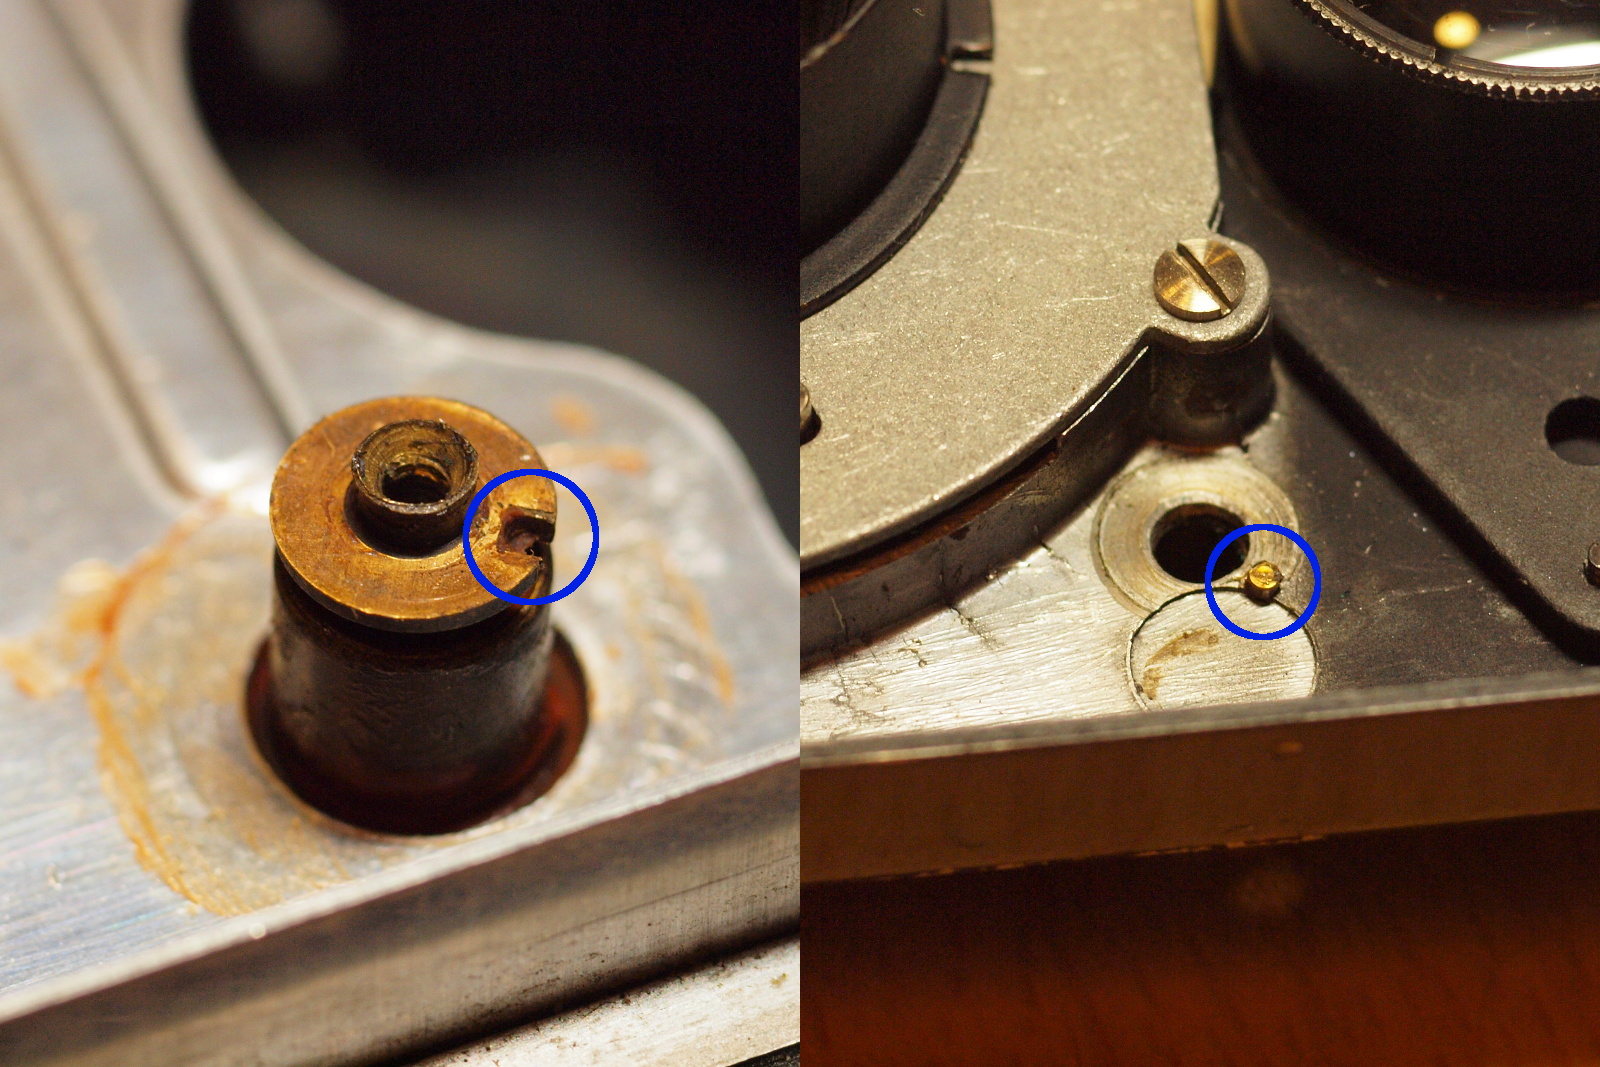 While installing the front plate, put the front plate back on without screws. Then slightly turn the focus knob and check the underlying focus screws through the screw hole first. As mentioned earlier, the notch on the focus screw should match with the dot on the plate. Thus it should not move when you turn the focus knob. Otherwise you will need to adjust the angle of it and re-install it again.
Here is a clip that demonstrates how to check if the focus screw is properly aligned: https://www.youtube.com/watch?v=mgkWgJbTUgg
Focus Calibration
If any of these focus screws are misaligned and cannot be restored to the initial state, it's time for focus calibration. This will be a tedious job. In the worst case, the focus screw and the viewing lens are both in need of calibration.
Turn the focus knob to infinity, put a grounded glass or a tracing paper in the film chamber:
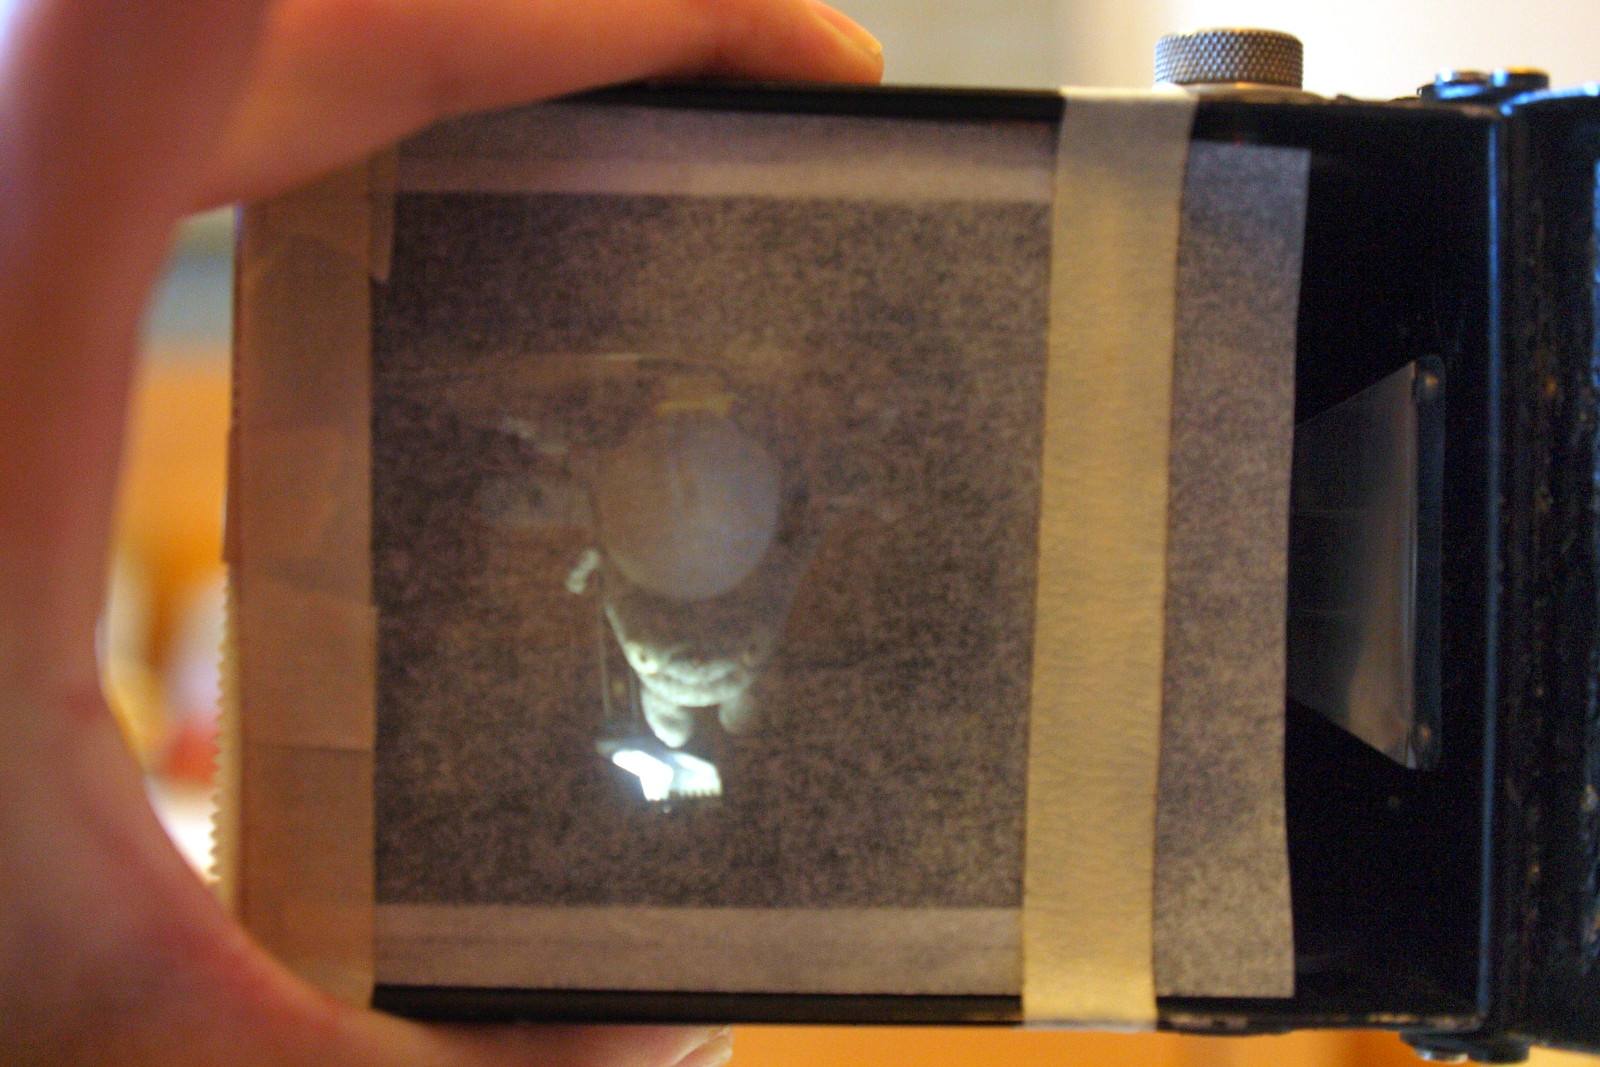 And repeat the following steps: adjust the focus screws -> install the front plate -> check on a distant target (bright moon, landscape). It's done when the target is sharp and clear. You can further verify that with other distance mark like 2m, 1.8m on the focus knob, just remember it MUST be able to focus on infinity.
Viewing Lens Calibration
When the target is sharp and clear from the film chamber, but not in focus from the view finder, you will need to adjust the viewing lens. The viewing lens is screwed to the front plate and fixed by a retainer plate with 2 screws. Remove those screws first (please refer to "Front Plate Removal" section, they're marked with yellow circles on the front plate), then loosen the retainer plate to free the lens. It's better to keep the retainer and the lens there for fine-tuning:
 To calibrate it, first make the taking lens focused on a target and repeat: loosen the retainer a little bit -> adjust the viewing lens -> check the result from the view finder. Remember to put the screws back when you're done.